Nicholas Zahansky
Septembr 28, 2023
Today I will walk you through getting Open Media Vault installed on an Orange Pi Zero 3 and configuring it for a RAID 1 Mirror. However, keep in mind that this setup will have some limitations.
For example, the drives you attach will be limited to USB 2.0 speeds. For this reason, it is not recommended to buy expensive drives in search for better performance.
OS Installation
I decided to include instructions for installing the OS in this guide because Open Media Vault only works best with debian bullseye. As such I want to make sure you are installing the correct image prior to installing Open Media Vault.
In order to install OMV on your Orange Pi Zero 3, you will need to use the official Debian bullseye image from the orange pi website.
Debian Bullseye
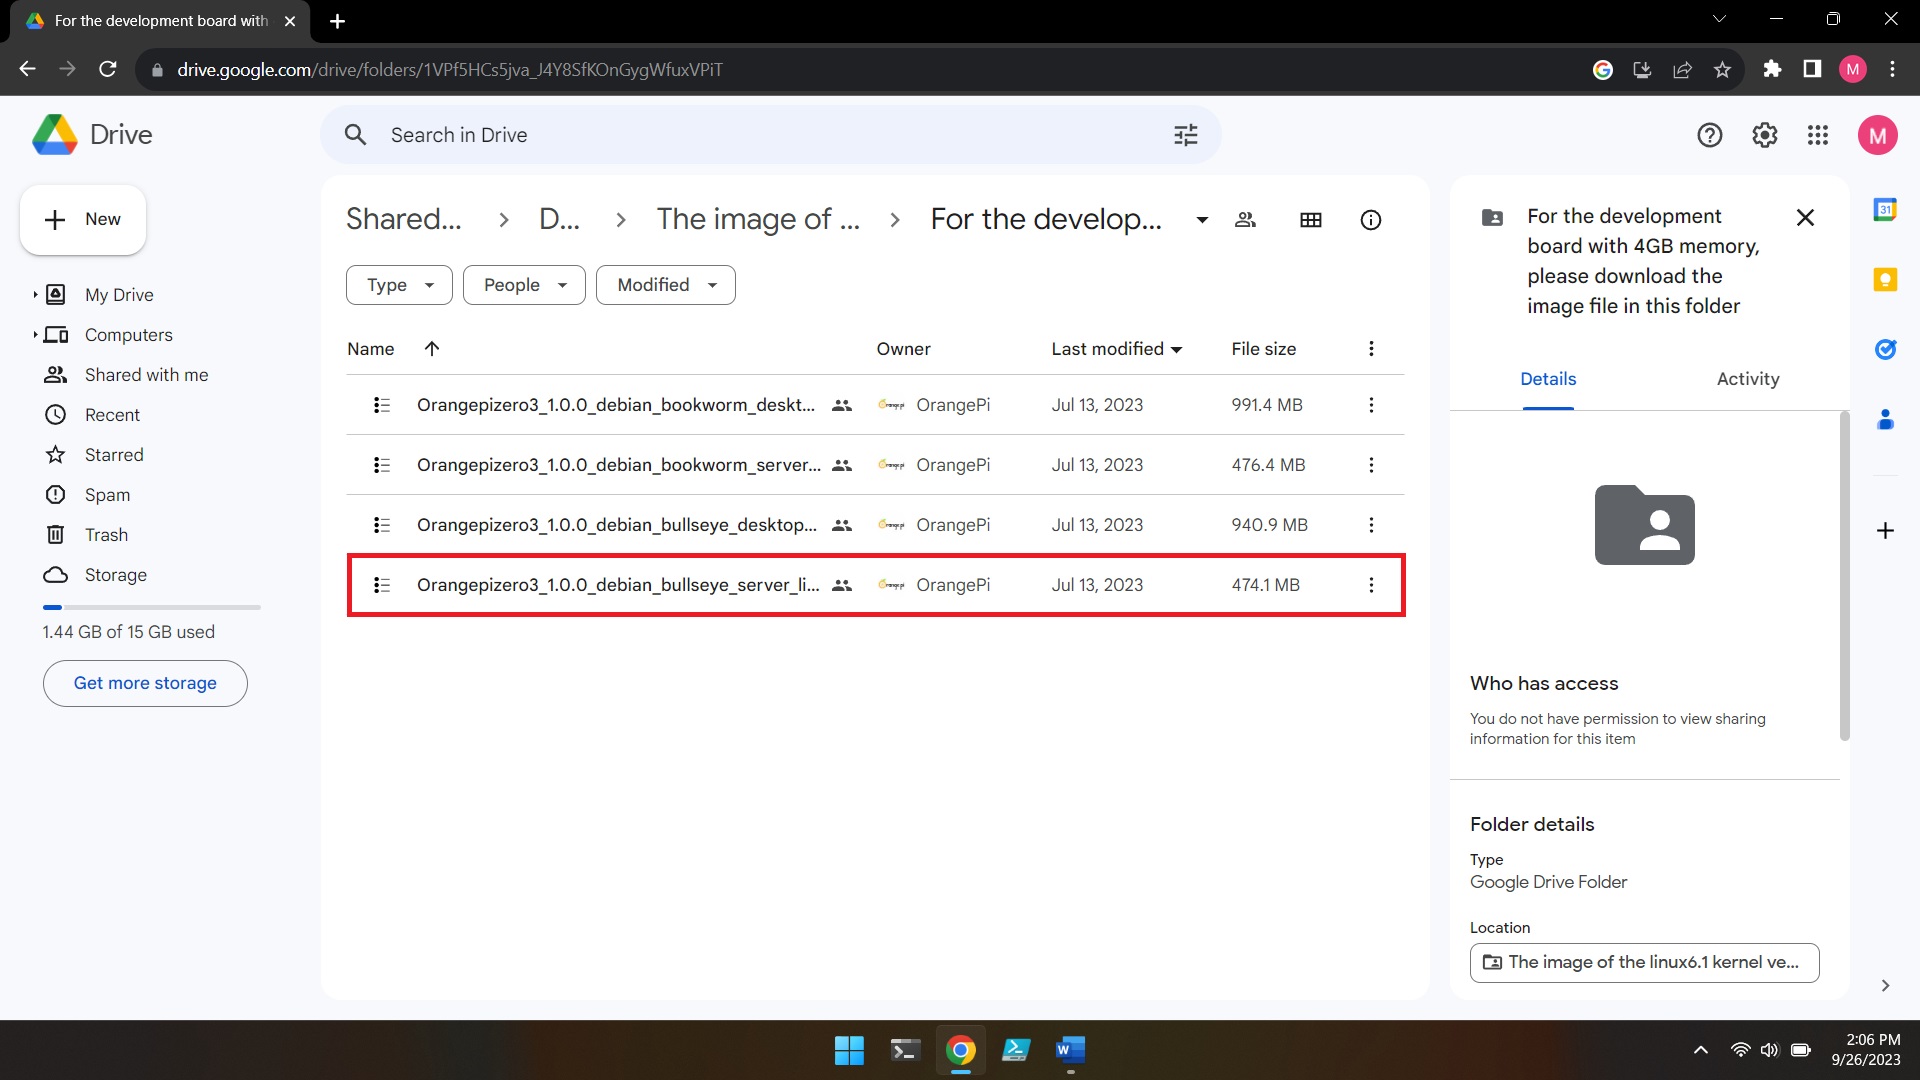
Make sure to download the correct version that corresponds with the RAM of your board as there are different images for each. Once you have the image file unzip the contents of the archive. Next, insert the SD card to your computer and Flash using Balena Etcher.

Once the SD card has been flashed eject it from your computer. Insert the SD card into the SD card slot on your orange pi zero 3. Connect your expansion board to the pins on the orange pi zero 3. Connect an Ethernet Cable and power cable to the orange pi zero 3. Locate the IP address of the pi on the network. I used nmap to locate it making sure to suppress a port scan with the -sn option.
Finally, remote into the Orange Pi using ssh or another remote application. The default credentials for the orange pi zero 3 are
root:orangepepi
Installing Open Media Vault
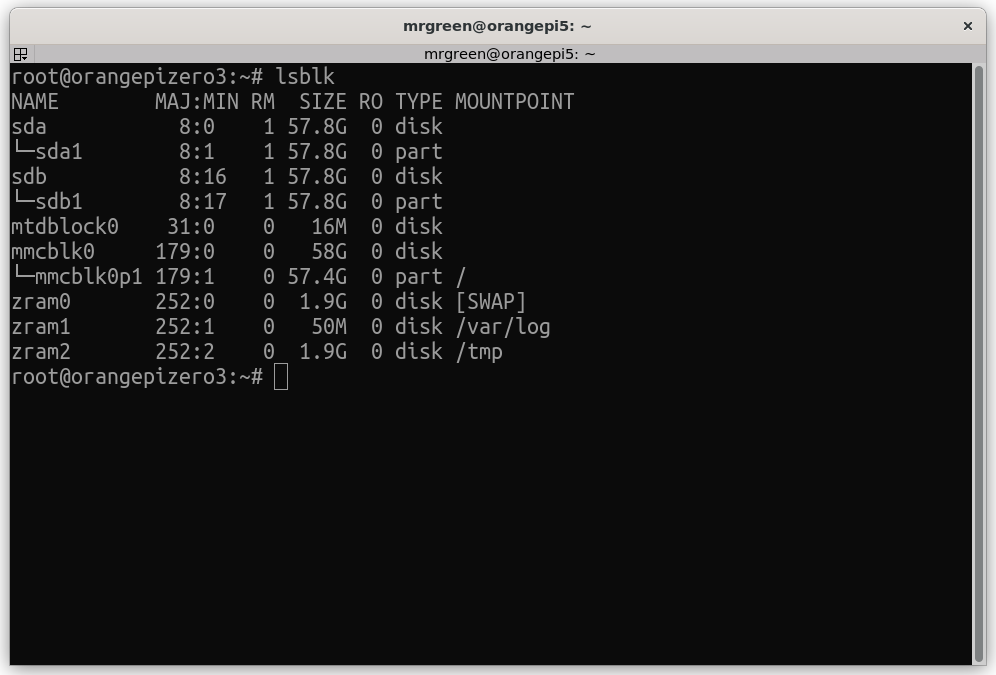
Running the following command we can see our two USB drives.
lsblk
But first we need to install open media vault. To install Open Media Vault onto your Orange Pi run the following script. The script should take some time to run.
wget -O - https://raw.githubusercontent.com/OpenMediaVault-Plugin-Developers/installScript/master/install | bash
The script will take some time to run so just wait until it is finished.
NOTE:
If you encounter an error make sure you are using the bullseye version of Debian from the official images on the orange pi website.
Once the script has finished we can now access Open Media Vault from the browser over our network. To access the application type the IP address of the Orange Pi into your browser. The default credentials to login are
admin:openmediavault
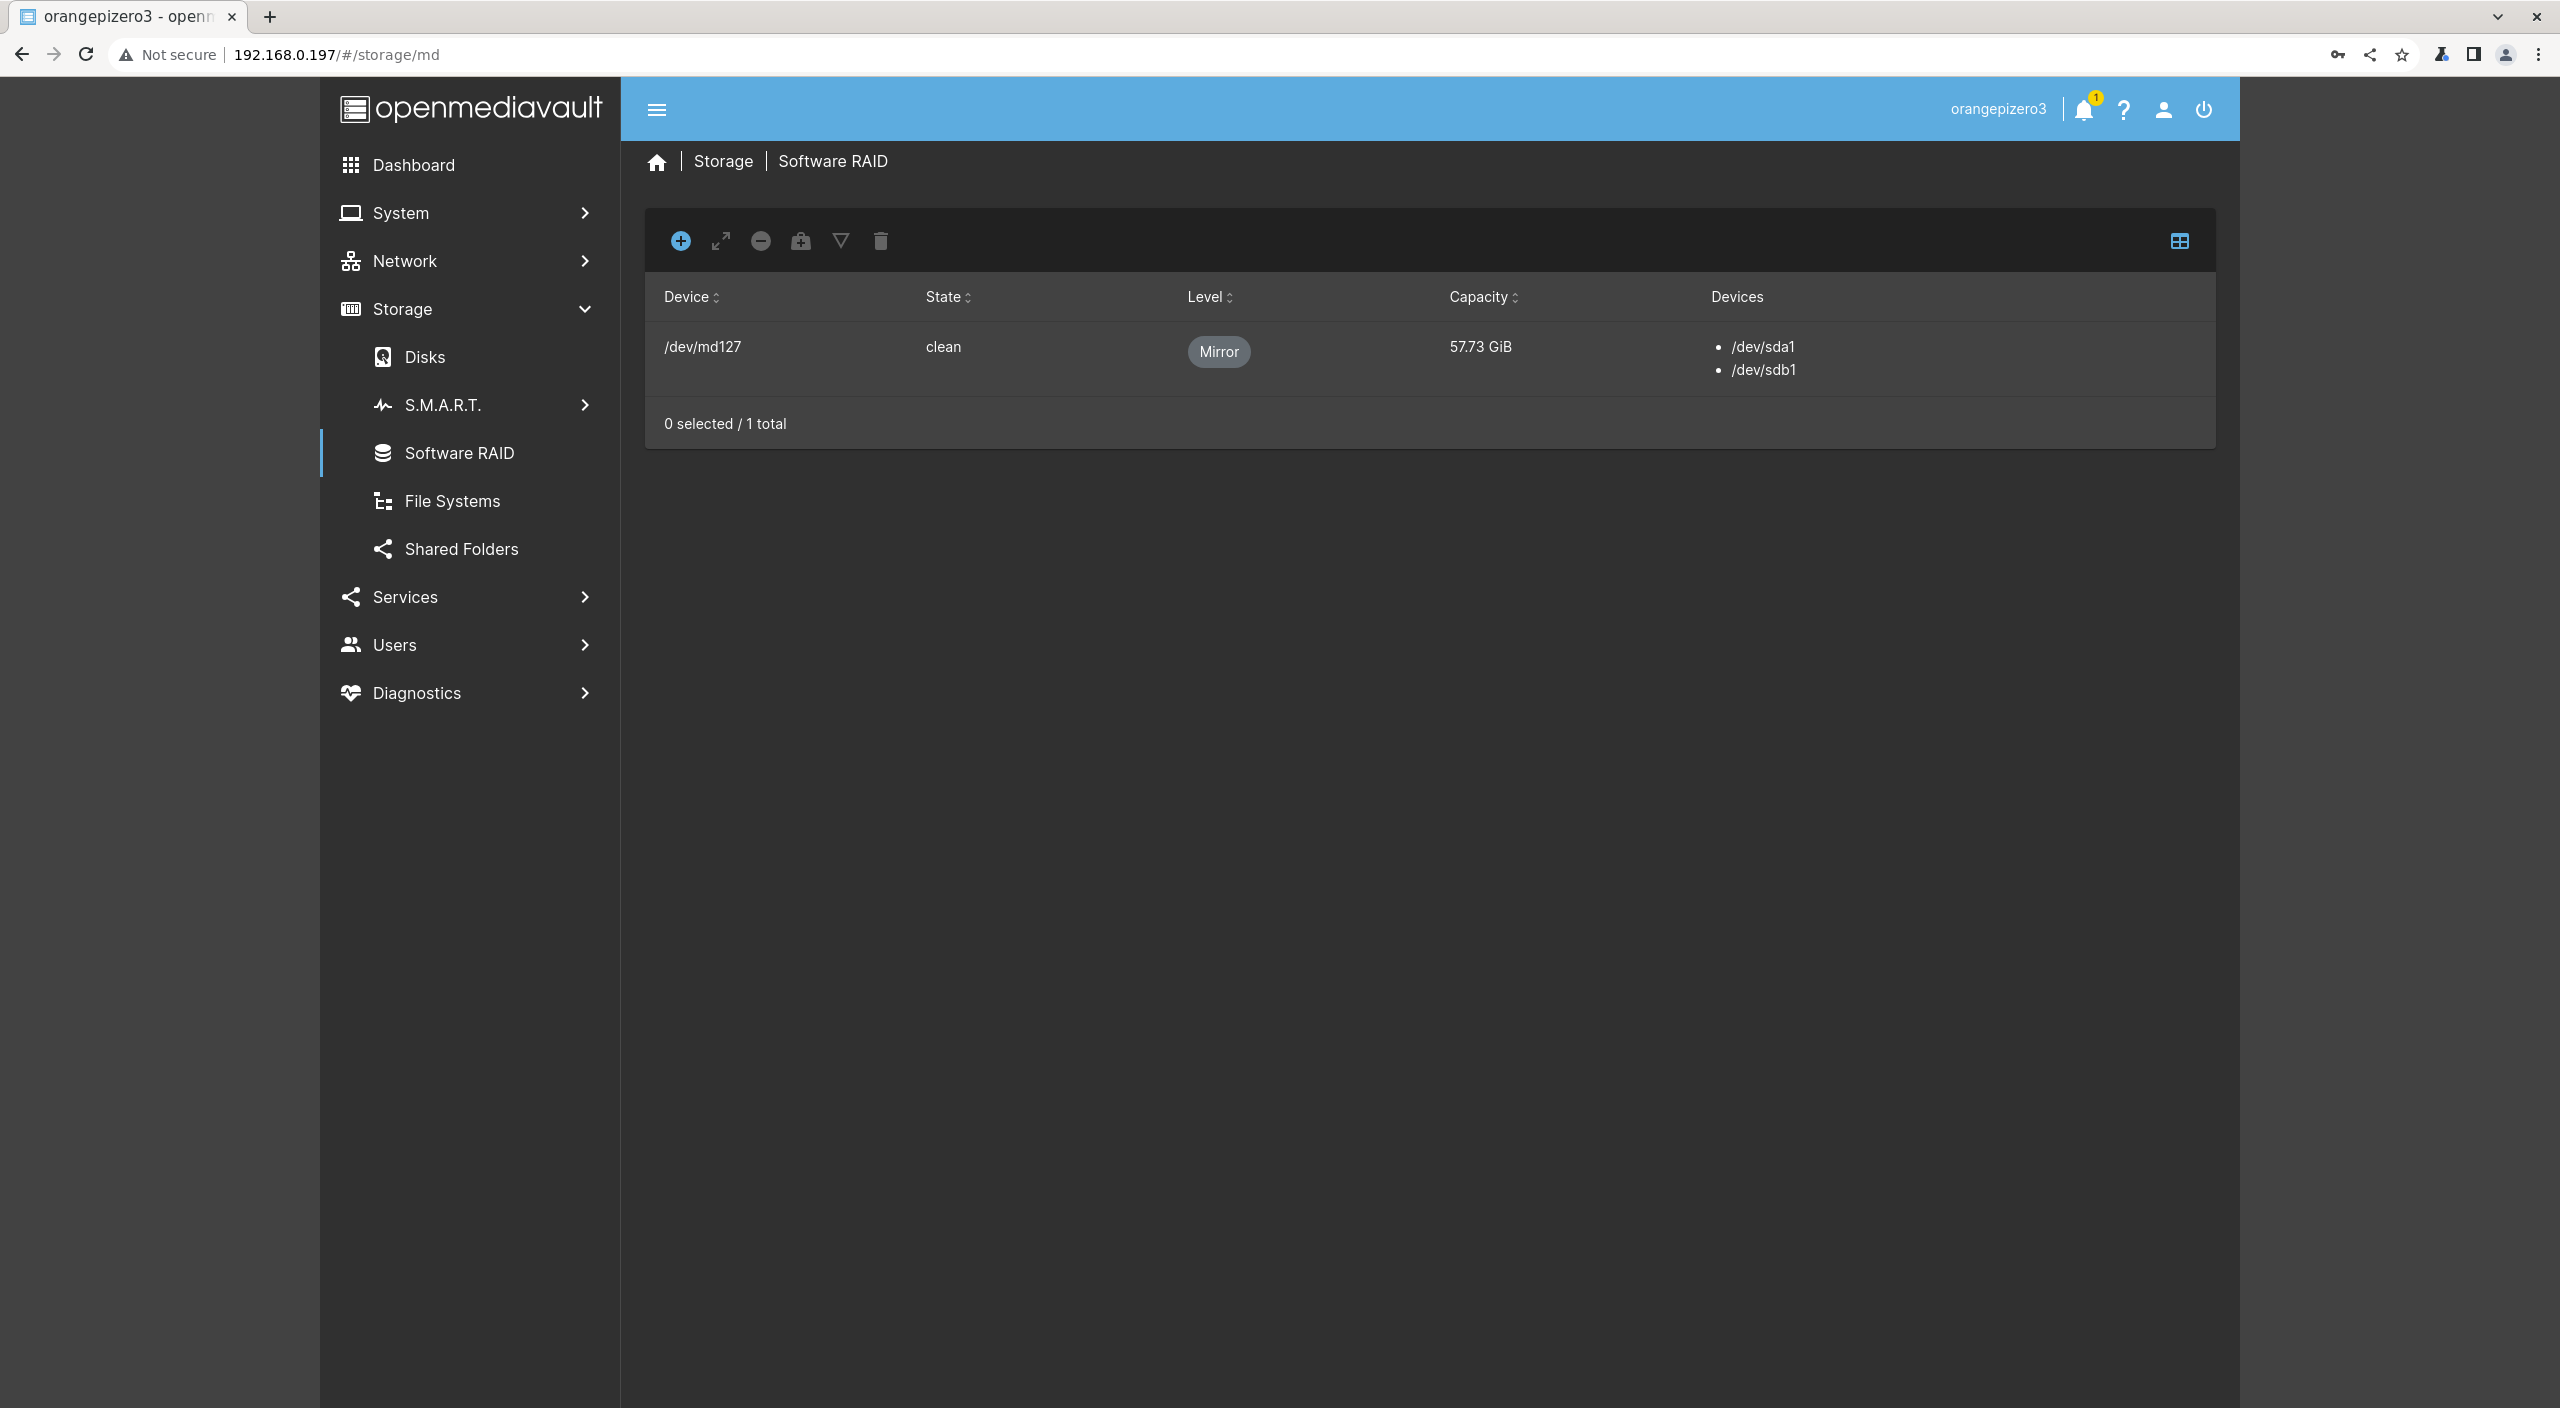
Configuring RAID 1 Mirror
Now that we have successfully installed open media vault we need to setup a RAID 1 mirror.
However, the application discourages us from doing so, stating that USB in RAID is unreliable and our drives will not be detected from Open Media Vault. To get around this we will have to setup our mirror using mdadm.
NOTE:
This is to expected to be done on clean drives with no existing data since this process will format the drives when we go to create a filesystem.
From your remote session execute to following command to setup a RAID mirror:
mdadm --create dev/md/name dev/sda1 dev/sdb1 --level=1 --raid-devices=2
Switching back over to our browser we can now see that the RAID is performing its initial sync and once it is complete it will report as clean
Once the array has finished building we can now create our file system.
In the browser select the file Systems tab and then click on the + icon to create and mount a file system.
For our purposes EXT4 will work just fine. Click the drop down menu for devices and select our RAID array.
Click apply changes
Once the changes have taken we can create shares to access over the network. If you would like to know how to do this please feel free to comment and I will work on another writeup.
If you have any future suggestions on topics you want me to cover feel free to comment as well.
This article contains links for which I may make a commission on qualifying purchases